• Home
  • Contact
  • Sitemap
  • Blog
  • About Us
  • Contact Us
  • Blog
  • My Account
  • Track Order
Cotytech
  • My Cart
Log In or Create Account
Have any questions? Call Us!
888-891-9321
001-951-427-3238 (International)
  • TV
    • Wall
    • Corner
    • Slatwall
    • Carts & Stands
    • Video Walls
  • Monitor
    • PC
    • Apple
  • Medical
    • Wall
    • Ceiling
    • Track
    • Accessories
  • Touch Screen
  • Speaker
    • Ceiling
    • Wall
    • Stands
  • Tablet
    • Car
    • Desk
    • Wall
    • Wheelchair
    • Stands
    • Holders
    • Under Cabinet
    • Tube or Pole
  • Laptop
    • Stand
    • Trays
  • Keyboard Tray
    • Basic
    • Articulated
    • Low Profile
  • Workstation
  • Ergonomic
    • CPU Holder
    • Arm Support
    • Pencil Tray
  • Accessories
  • Customization
  • PROMOTIONS!
Home > Blog > How to Install a Monitor Desk Mount
July 31
Richard Bach
Share Facebook Twitter Email


Desk mounts can be complicated to install. Depending on the base, there are certain steps that must be taken to install a mount properly. Below you will find a step by step guide on how to install a monitor desk mount in no time:

Step 1: Attach the Base Mount to Your Desk

There are five different base mounts, and the instructions for mounting depend on the type you have.

Low Profile Mount

Start by placing the vertical assembly on the base mount. Make sure the external tube is lined up with the cut-out and with the base’s guide. Take an Allen wrench and secure the vertical assembly to the mount base.

Slide the base onto your desk and tighten the clamping screws. Proceed to Step 2.

Clamp Mount

Clamp mounts have bottom and vertical assembly. Start by removing the bottom assembly. Do the same as with the Low Profile mount, but instead of sliding the base onto the desk, you will follow different instructions.

Position the base of the clamp mount at the desk and reattach the bottom assembly to the mount. Use an Allen wrench to tighten the bottom assembly screws. Use clamp disk screws to secure the mount onto the desk. Proceed to Step 2.

Grommet Mount

Start by loosening the pinch screws to separate the pole assembly from the grommet mount assembly. Unscrew three screws to take the lower plate off the grommet assembly. Remove the backing from adhesive tape. Place a lower plate under the desk but make sure it is concentric with the grommet hole. Place the upper mount into the grommet hole.

Align the holes in a lower plate with mounting screws and close-fit them to the table. Place the vertical assembly into the mount. Tight the pinch screws at the desired height. Go back to mounting screws and fully tighten them. Proceed to Step 2.

Direct Mount

Take the mount and place it in the desired spot on your desk. Use all four screws to secure the mount. Proceed to Step 2.

Bolt Mount

Drill a ½” hole in your desk, place the large bolt through the hole in the curved plate and screw it into the vertical assembly pole. Make sure that the hole at the top of the pole is facing away from the user before tightening the large bolt completely. Proceed to Step 2.

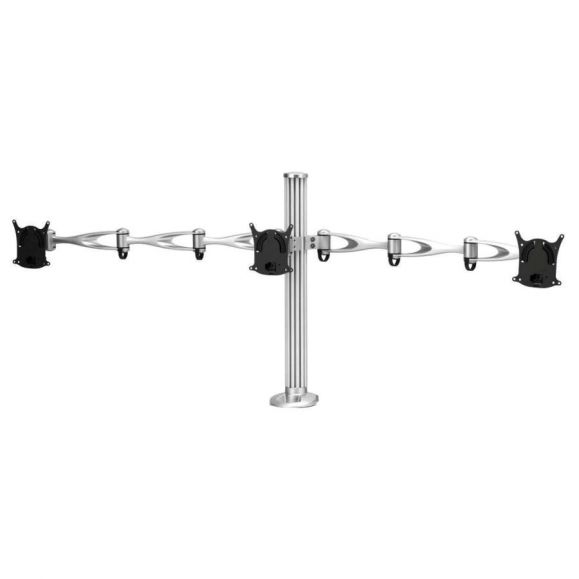
Step 2: Attach the Monitor Desk Mount Arm to the Mounting Post

For the top mount, align the screw on the mounting post with the groove in the arm post. Slide the arm post into the mounting post and tightly secure it with a screw.

If you are using a bracket mount, place it on the mounting post and tighten the knob at the desired height.

Step 3: Attach the VESA Bracket to the Monitor

Attaching the VESA to your monitor is straightforward. Place the cut-out on the VESA bracket toward the top of the monitor. Attach the VESA with either the provided screws or the screws that arrived with your monitor.

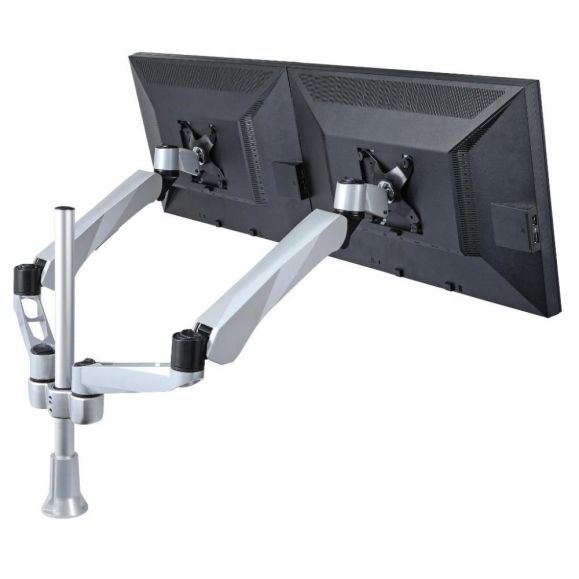
Step 4: Attach the Monitor to the Monitor Arm

Before you attach the monitor to the arm, check if the arm has the Quick Release Lever (QRL). Take your monitor and place the cut-out on the VESA bracket - just over the Lip on the arm. Push the bottom of the monitor into the arm. A “click” sound will signal that you did it right.

If your arm doesn't have a QRL, you will need to secure your monitor to arm with screws.

This guide will help you mount your monitor on any flat screen mounting and placement solution including the latest Cotytech models. Browse our selection today!

  • Choose The Right Mount

    5 things to consider before buying
  • New From Cotytech

    Explore our latest innovations
  • Sign up for our newsletter to stay up-to-date with our promotions, discounts, sales, and special offers.

Information

  • About Us
  • Contact Us
  • Shipping & Returns
  • Privacy Policy
  • Terms & Conditions
  • Warranty

My Account

  • My Account
  • Order History
  • Track Orders
  • Address Book
  • Contacts

  • Address: 7056 Archibald Avenue
    Suite 102198
    Corona, CA 92880
  • Phones: 1-888-891-9321
  • Hours: Mon - Fri 9:00 am - 5:00 pm
  • E-mail: info@cotytech.com
© Cotytech. All Rights Reserved. Powered by Warhead
Our website uses cookies to make your browsing experience better. By using our site you agree to our use of cookies. Learn More I Agree
× What Are Cookies As is common practice with almost all professional websites this site uses cookies, which are tiny files that are downloaded to your computer, to improve your experience. This page describes what information they gather, how we use it and why we sometimes need to store these cookies. We will also share how you can prevent these cookies from being stored however this may downgrade or 'break' certain elements of the sites functionality. For more general information on cookies see the Wikipedia article on HTTP Cookies. How We Use Cookies We use cookies for a variety of reasons detailed below. Unfortunately in most cases there are no industry standard options for disabling cookies without completely disabling the functionality and features they add to this site. It is recommended that you leave on all cookies if you are not sure whether you need them or not in case they are used to provide a service that you use. Disabling Cookies You can prevent the setting of cookies by adjusting the settings on your browser (see your browser Help for how to do this). Be aware that disabling cookies will affect the functionality of this and many other websites that you visit. Disabling cookies will usually result in also disabling certain functionality and features of the this site. Therefore it is recommended that you do not disable cookies. The Cookies We Set
Account related cookies If you create an account with us then we will use cookies for the management of the signup process and general administration. These cookies will usually be deleted when you log out however in some cases they may remain afterwards to remember your site preferences when logged out. Login related cookies We use cookies when you are logged in so that we can remember this fact. This prevents you from having to log in every single time you visit a new page. These cookies are typically removed or cleared when you log out to ensure that you can only access restricted features and areas when logged in. Form related cookies When you submit data to through a form such as those found on contact pages or comment forms cookies may be set to remember your user details for future correspondence. Site preference cookies In order to provide you with a great experience on this site we provide the functionality to set your preferences for how this site runs when you use it. In order to remember your preferences we need to set cookies so that this information can be called whenever you interact with a page is affected by your preferences.
Third Party Cookies In some special cases we also use cookies provided by trusted third parties. The following section details which third party cookies you might encounter through this site.
This site uses Google Analytics which is one of the most widespread and trusted analytics solution on the web for helping us to understand how you use the site and ways that we can improve your experience. These cookies may track things such as how long you spend on the site and the pages that you visit so we can continue to produce engaging content. For more information on Google Analytics cookies, see the official Google Analytics page. We also use social media buttons and/or plugins on this site that allow you to connect with social network in various ways. For these to work, the social networks may set cookies through our site which may be used to enhance your profile on their site, or contribute to other purposes outlined in their respective privacy policies.